
1.0 Introduction
If you have ever sat in front of PageSpeed Insights after adding a CDN to a PrestaShop store only to watch Largest Contentful Paint (LCP) move, you have already learned the lesson this article is built around: a CDN is not an optimization; it is a distribution mechanism. It moves bytes to the customer. It does not decide how many bytes there are, what format they are in, or whether they are the right image for the device requesting them.
The same applies in reverse. Compressing a product image from 400 KB to 90 KB feels like a win.. It usually is. But if that image is then served from an origin with no caching over a CDN configuration that treats every query string as a unique object or through a theme that is still requesting the full desktop derivative on a 375px-wide mobile viewport, the compression gain gets absorbed by everything else in the delivery chain.
This article walks through that chain PrestaShop → web server → image generation/storage → CDN → cache → browser → rendering and shows where each stage commonly breaks down in real PrestaShop stores. It is written for developers and technical SEOs who need to diagnose storefronts, not for readers who just want to be told, “Compress your images and turn on a CDN.” ” Where a behavior depends on your PrestaShop version, theme, or CDN provider, it is flagged as such. This isn’t a one-size-fits-all checklist, and treating it as one is part of how these problems happen in the place.
2.0 Why Images Can Slow Down PrestaShop Stores
PrestaShop storefronts are image-heavy by nature. A single category page can request 20–40 product thumbnails, a homepage can load slider and banner images, and a product page adds combination images, zoom images, and often cross-sell or “related products” thumbnails from a separate module. Images frequently account for the share of total page weight on a PrestaShop storefront, and the main product image is very often the LCP element on product pages.
That means image performance problems compound. A single oversized image is an issue. Twelve oversized category thumbnails, all served without caching, is a page that fails Core Web Vitals, and a CDN sitting in front of a misconfigured cache does not fix that; it just adds a network hop that may or may not be doing useful work.
The core message worth holding onto through the rest of this article:
Image optimization reduces the amount of data that needs to be delivered, while correct CDN configuration determines how efficiently that data reaches the customer. Optimizing one side can leave significant performance bottlenecks unresolved.
3.0 Understanding PrestaShop Image Performance
PrestaShop does not handle “an image”; rather, it handles a particular derivation of an image based on the image type configuration, and what derivation is served depends on the template, the device, and in most cases the responsive behavior implemented with JavaScript.
Things to understand prior to optimization:
- Product images : the original uploaded image, from which PrestaShop generates a set of derivatives (thumbnails, “home,” “medium,” “large,” “cart,” etc., depending on how image types are configured under Preferences → Images).
- Product combinations: combination-specific images (e.g., color variants) that may or may not regenerate correctly when combinations are added after the fact.
- Product thumbnails used across category listing, search results, and cross-sell blocks; often the single largest contributor to category-page image weight because there are so many of them per page.
- Category images and manufacturer/brand images usually have a lower volume but are frequently forgotten during optimization audits.
- CMS images inserted through the WYSIWYG editor, which means they’re rarely subject to any automated optimization pipeline at all.
- Homepage banners and sliders are usually large, often above the fold, and a common source of oversized LCP candidates.
- Theme assets: background images, icons, and decorative graphics bundled with the theme itself, outside PrestaShop’s product image pipeline entirely.
- Module-generated images: image blocks or sliders added by category/homepage modules, which often have their own upload and rendering logic independent of core image types.
The reason this list matters: “optimize the images” is not one task, it’s several, and they don’t share a single pipeline. Compressing product images through a module does nothing for a slider banner uploaded directly into a CMS block, and regenerating thumbnails after a theme change does nothing for third-party module images.
3.1 A concrete example: the mobile/desktop mismatch
A common pattern on PrestaShop product pages: the main product image is displayed at roughly 375px wide on a mobile viewport, but the <img> tag because the theme template hasn’t implemented srcset/sizes, or because a large_default derivative is hardcoded points at an 800×800 or 1000×1000 image. The browser downloads the full desktop-oriented file and then scales it down in CSS.
The visual result looks identical to the shopper. The performance result is not
- Network transfer: The mobile user downloads several times more data than the layout actually displays.
- LCP: If that image is the LCP element (very likely on a product page), the extra download time is added directly to the LCP score.
- Page weight multiplies across every product page, category thumbnail grid, and search result page using the same pattern.
- User experience on constrained mobile connections, this is the difference between a product page that feels instant and one that visibly loads.
This is precisely why file-size compression alone is an incomplete fix: a “compressed” 300 KB image that’s still 3× larger than the container it’s displayed in is still a wasted download.
4.0 How to Optimize Images in PrestaShop
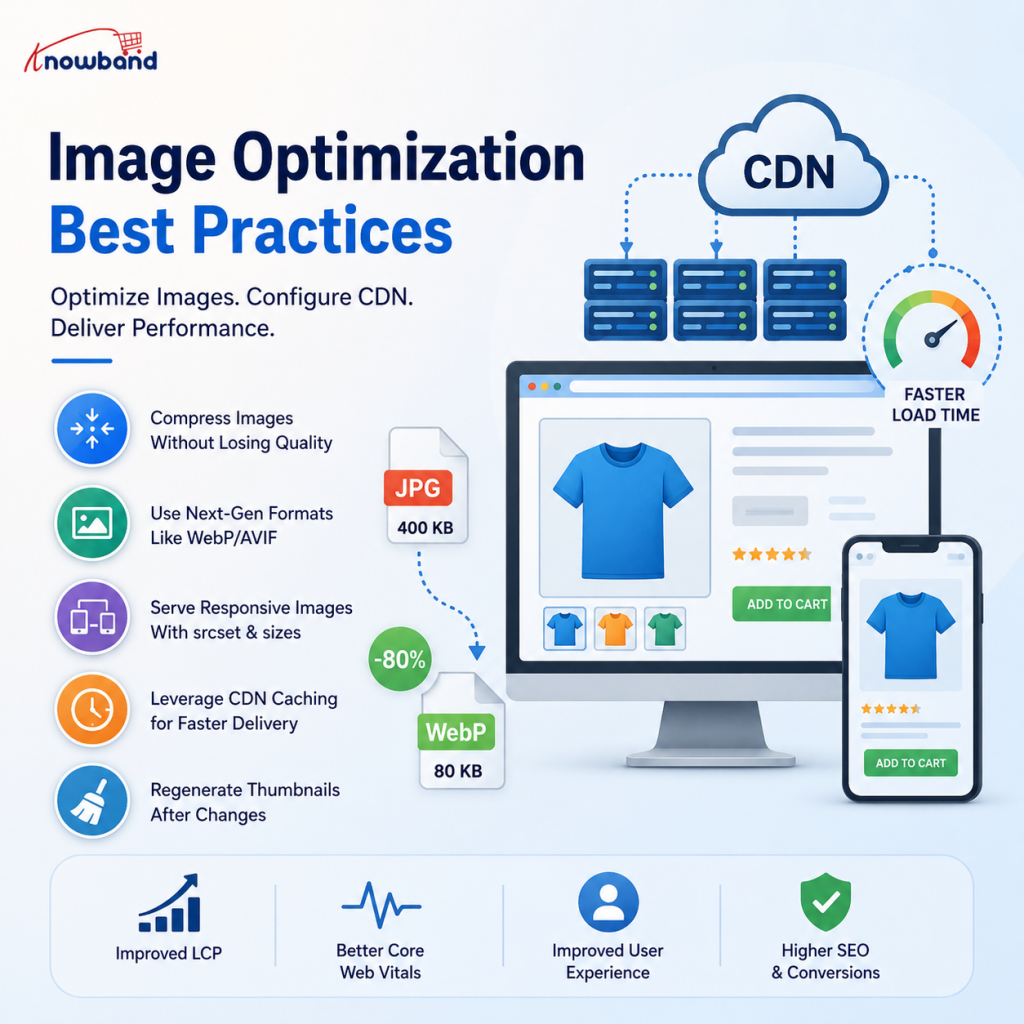
Treat this as a diagnostic process, not a checklist to complete once and forget.
- Identify the actual image being downloaded. Open Chrome DevTools → Network → filter by Img, reload the page, and look at what’s actually requested not what you assume the theme is serving.
- Check its intrinsic dimensions. Click the request, and check the “Preview” tab or the response headers for actual pixel dimensions.
- Check its rendered dimensions. Inspect the element in the Elements panel and look at the computed CSS width/height (or use the Lighthouse “Properly size images” audit, which reports both).
- Compare source vs. displayed size. A 1000×1000 source rendered at 300×300 CSS pixels is a strong candidate for a smaller derivative or responsive srcset.
- Check the file format. JPEG, PNG, WebP, or AVIF and whether PNG is being used for photographic content where JPEG/WebP would compress far better.
- Check compression. Look at file size relative to dimensions and format; a 500 KB JPEG at 800×800 usually indicates minimal or no compression was applied.
- Check responsive delivery. Does the <img> or <picture> element use srcset/sizes, or is it a single fixed source regardless of viewport?
- Check fold position. Is the image above the fold (candidate for eager loading/priority) or below the fold (candidate for lazy-loading)?
- Check lazy-loading behavior. Confirm loading=”lazy” isn’t applied to the LCP candidate and that lazy-loaded images aren’t blocked by broken IntersectionObserver polyfills or JS errors.
- Re-test after each change. One variable at a time changing format, dimensions, and CDN configuration simultaneously makes it impossible to know what actually helped.
Useful tools for steps 1–9: Chrome DevTools Network panel (request/response headers, timing, initiator), Lighthouse (“Properly size images,” “Serve images in next-gen formats,” “Efficiently encode images” audits), PageSpeed Insights (field + lab data, LCP element identification), image metadata (via identify from ImageMagick or similar), and the DevTools Performance waterfall for understanding request timing relative to render.
Avoid treating any of these tools’ compression-percentage suggestions as guaranteed outcomes actual savings depend on the source image, format, and content, and no article or tool can promise a fixed percentage across all images.
5.0 How to Reduce LCP Caused by Images
Before optimizing anything, confirm the image is actually the LCP element. Use the Lighthouse report or PageSpeed Insights “LCP element” callout, or the DevTools Performance panel’s LCP marker. On PrestaShop storefronts, common LCP candidates are the main product image, the homepage hero banner, or a category banner but this varies by theme, and assuming without checking is a common diagnostic mistake.
Once identified, the available levers fall into distinct categories, and it’s worth being deliberate about which one you’re pulling:
- Making the image smaller with correct dimensions, appropriate compression, and appropriate format. Reduces the bytes that must be transferred.
- Making the image discoverable earlier, ensuring the image reference is in the initial HTML (not injected by JavaScript after other work completes), and, where genuinely justified, using it <link rel=”preload”> for the specific LCP image.
- Serving it from a faster location with correct CDN caching so the request is answered from edge cache rather than round-tripping to the origin.
- Reducing server/CDN latency addressing TTFB at the origin or at the CDN edge, separate from the image’s own file size.
- Reducing render-blocking dependencies render-blocking CSS/JS that delays the browser reaching the point where it can request the image at all.
A few explicit warnings worth stating plainly, since they’re common over-corrections:
- Do not preload every image. Preloading is a signal that tells the browser “fetch this immediately, ahead of normal priority.” Applying it broadly competes for bandwidth with the actual LCP resource and can make LCP worse, not better.
- The LCP image should generally not be lazy-loaded. loading=”lazy” on the LCP candidate delays its discovery until the browser has already begun layout, which directly works against the goal.
- fetchpriority=”high” on the confirmed LCP image can help the browser prioritise it among competing requests, but this only helps if the image was discoverable early in the first place it doesn’t compensate for a JavaScript-injected image source.
6.0 How to Serve WebP Images in PrestaShop
WebP typically produces smaller files than JPEG or PNG at comparable visual quality, and it’s supported by all current major browsers. But “serving WebP” is a claim that needs to be true at the byte level, not just the filename level.
A .jpg file renamed to .webp is not a WebP image. The file extension does not change the encoding the browser will either fail to render it or render it incorrectly, and any performance benefit from WebP’s better compression simply won’t exist, because the bytes were never re-encoded. This sounds obvious stated directly, but it’s a genuinely common failure mode when WebP “support” is bolted on via .htaccess rewrites without actually generating WebP-encoded derivatives.
There are several legitimate ways WebP delivery gets implemented in PrestaShop stores, and which one applies to a given store depends on the setup:
- CDN-based image transformation some CDN/image-CDN providers can transform and re-encode images on the fly based on the Accept header the browser sends (content negotiation), serving WebP to browsers that support it and the original format to those that don’t. Exact behavior, configuration, and whether this is automatic or requires explicit rules depend entirely on the provider—VERIFY against your specific CDN’s documentation before assuming this is happening.
- Pre-generated WebP derivatives a module or build step. webp versions alongside the original derivatives at upload/regeneration time, and the theme or server serves the appropriate one.
- Module-based WebP implementations: Several PrestaShop marketplace modules handle WebP generation and serving; their exact mechanism (server-side conversion, .htaccess content negotiation, or CDN delegation, varies by module and should be confirmed rather than assumed.
- Theme-level implementation some themes include <picture> markup out of the box; many older or unmodified themes do not, and this needs to be checked in the actual rendered HTML rather than assumed from the theme’s marketing description.
Where implemented manually, the standard pattern uses <picture> a WebP <source> and a fallback <img>:
<picture>
    <source
        srcset="/img/product/example.webp"
        type="image/webp">
    <img
        src="/img/product/example.jpg"
        width="800"
        height="800"
        alt="Product name">
</picture>
The fallback <img> matters; it’s what browsers without WebP support (or, more commonly today, tools like older PDF renderers or certain crawlers) will use, and it’s also what preserves width/height for CLS purposes regardless of which source loads.
A brief note on AVIF: it can produce even smaller files than WebP in many cases and is gaining browser support, but tooling, module, and CDN support for AVIF in the PrestaShop ecosystem is less mature and more provider-dependent than WebP. Worth evaluating as a future step; VERIFY current support in your specific stack before committing to it as a primary format today.
7.0 PrestaShop CDN Optimization Explained
A CDN’s actual job is straightforward: cache static resources at edge locations geographically distributed closer to your customers, so repeat requests for the same resource don’t have to travel all the way back to your origin server each time.
What a CDN does not automatically fix:
- Slow PHP execution on the origin
- Slow database queries
- Poorly performing PrestaShop modules
- Incorrect image dimensions being generated in the first place
- Oversized images that were never compressed
- Broken or overly restrictive cache rules
- Incorrect origin configuration
- Poor cacheability of the response (e.g., headers that prevent caching)
- Application-level bottlenecks generally
The distinction worth internalizing is origin performance vs. edge delivery performance. These are two different problems with two different fixes. A CDN improves edge delivery performance it reduces the network distance and, when the cache is actually being used, reduces load on the origin. It does nothing for origin performance, and if the cache is misconfigured such that it misses constantly and re-fetches from origin on every request, you’ve added a network hop without gaining the caching benefit that justifies it.
8.0 How to Configure CDN for PrestaShop
CDN configuration is not standardized across providers control panel layout, terminology, and available features differ meaningfully between providers. What follows is the general architecture and the concepts that apply broadly; specific configuration steps should be taken from your CDN provider’s own documentation, not assumed to be identical to another provider’s setup.
Cache hit (the common case, once configured correctly):
Customer
   ↓
CDN Edge
   ↓
Cached Image
   ↓
(served directly to customer)
Cache miss:
Customer
   ↓
CDN Edge
   ↓
Origin Server (PrestaShop)
   ↓
Image fetched, cached at edge, returned to customer
Concepts to configure and verify, regardless of provider:
- CDN hostname and origin hostname: The CDN needs to know which domain to pull from, and your PrestaShop theme/config needs to point at the CDN hostname for static assets.
- DNS correctly pointing the CDN hostname (often a CNAME) at the provider’s edge network.
- HTTPS/TLS certificates the CDN edge needs a valid certificate for its hostname; mixed HTTP/HTTPS resources will be blocked or flagged by browsers.
- Static asset routing confirming which paths (image directories, theme assets) are actually routed through the CDN versus served directly from the origin.
- Cache rules for which file types/paths are cacheable and under what conditions.
- Cache-Control headers and TTL how long the CDN (and browser) is permitted to hold a cached copy before re-validating with origin.
- Cache keys: What combination of URL, query string, and headers does the CDN use to decide whether two requests are “the same” cacheable object
- Query string handling whether query strings are included in, or stripped from, the cache key.
- Compression (gzip/Brotli) whether the CDN or origin is applying transport compression to compressible responses.
- Image transformation if the provider offers on-the-fly resizing/format conversion, whether it’s enabled and correctly scoped.
- Cache invalidation/purging: how to clear a specific cached object (or path) when the underlying image changes.
- Origin shielding some providers offer an additional caching layer between edge nodes and origin to reduce origin load further; availability and configuration is provider-specific.
9.0 How to Fix CDN Cache Issues
This is where most “we added a CDN but it didn’t help” tickets actually live. Common symptoms:
- Old product images remain visible after an update
- Some images are clearly served from the CDN, others from origin, inconsistently
- Cache HIT/MISS status is inconsistent across repeated requests for the same resource
- The same image is repeatedly re-downloaded from origin instead of served from cache
- Different URLs (due to versioning parameters, theme changes, or module behaviour) create duplicate cache entries for what is functionally the same image
- Query strings prevent the caching behaviour you’d expect
- Cache-Control headers from origin are missing, too short, or set to no-cache/private
- CDN cache rules simply don’t cover the path pattern the images are actually served from
- Purging a cache entry doesn’t seem to invalidate what you expected it to
- The CDN continues returning stale content after an update
Diagnosis relies on response headers, and it’s worth checking these directly in DevTools rather than assuming behavior:
- Age: how long (in seconds) the response has been sitting in cache.
- Cache-Control—the directive the origin sent and/or what the CDN is now applying.
- ETag is a validator the CDN/browser can use to check if a cached copy is still current.
- Last-Modified: a timestamp-based validator, often used alongside or instead of ETag.
- Provider-specific cache status headers many CDNs add their own header indicating HIT/MISS/EXPIRED/STALE (naming varies by provider do not assume every CDN uses the same header name; check your provider’s documentation for the exact header).
In Chrome DevTools, the Network panel lets you confirm, per request, whether the request actually reached the CDN domain (check the request URL’s host), the response headers (cache status, Age, Cache-Control), response timing (a cache HIT should generally show markedly lower TTFB than a MISS, though this varies by provider and edge load), content type and content length, and general cache-related headers as above. This is the difference between assuming the CDN is helping and actually confirming it.
10.0 CDN Cache Keys, TTL, and Invalidation
10.1 Cache key problems
Different URLs can be treated as entirely different cache objects, even when they point to visually identical content. For example:
/img/product/example.webp
/img/product/example.webp?v=1
/img/product/example.webp?v=2
Depending on CDN configuration, these three URLs may each occupy a separate cache slot. If your storefront (via a theme, module, or cache-busting mechanism) generates image URLs with constantly changing query parameters, you can end up with a CDN that’s technically caching but effectively never serving a cache hit, because every request looks like a new object.
The fix isn’t automatically “strip all query strings from the cache key.” That can be actively dangerous: if a query parameter genuinely changes the image content returned (for example, a transformation parameter controlling width, quality, or format), stripping it from the cache key can cause the CDN to serve the wrong variant of the image to a customer who requested a different one. This is exactly the kind of change that needs staging-environment verification before it goes live.
Cache-key optimization must preserve content correctness. Test that every parameter you’re considering excluding from the cache key genuinely has no effect on the response body before excluding it.
10.2 TTL and invalidation
A realistic PrestaShop scenario: a store owner replaces a product image in the back office, but customers keep seeing the old one. Possible causes, in rough order of likelihood:
- Browser cache (the customer’s own browser hasn’t re-requested the image)
- CDN cache holding the previous version until TTL expiry
- The image URL is unchanged, so there’s no natural cache-bust the CDN has no reason to know the content changed
- Generated thumbnails weren’t regenerated after the replacement (a PrestaShop-side issue, separate from CDN behavior)
- Cached HTML (via a full-page cache, if one is in use) still references the old image path/filename
- Origin-side caching (opcode cache is unrelated here, but some hosting stacks add their own static file caching layer)
- The purge that was issued didn’t cover the correct scope (e.g., purged the HTML page but not the image path, or purged by URL when the CDN indexes by a different cache key)
10.3 Safe troubleshooting sequence:
- Verify the origin image directly (bypass the CDN request the origin URL, or use a cache-busting query string against the origin, to confirm the origin itself has the updated file).
- Check the exact URL the browser is requesting (DevTools Network confirm it’s the expected path).
- Inspect CDN response headers for the request.
- Determine HIT/MISS status where the provider exposes it.
- Check Cache-Control/TTL behavior against what you’d expect.
- Purge the specific resource (not the entire cache) if the origin is confirmed correct but the CDN is still stale.
- Re-test with a fresh request (private/incognito window or explicit cache bypass) to rule out local browser cache.
- Confirm the updated image is now being served consistently.
Avoid making “purge the entire CDN cache” your default response to every stale-image ticket. It works, but it also discards every other cached object on the site, forcing a wave of origin requests and temporarily degrading performance for every visitor until the cache repopulates often to fix a problem that was scoped to a single image.
11.0 PrestaShop Theme and Module Impact on Images
PrestaShop core’s image generation and display logic is only part of the picture. Themes and modules routinely introduce their own image behavior, independent of anything configured under Preferences → Images:
- Generating additional image sizes outside the standard image-type configuration (common in slider/carousel modules that crop or resize on upload).
- Loading unnecessary images related to product blocks, “recently viewed” widgets, and upsell modules can each add their own image requests to a page that already has plenty.
- Changing image markup a theme override might replace standard <img> output with a JS-rendered gallery component that behaves differently for lazy-loading and responsive delivery than the theme’s default templates suggest.
- Injecting lazy-loading via a third-party JS library, which may or may not respect the native loading=”lazy” attribute or correctly exclude the LCP image.
- Loading third-party images trust badges, payment logos, or embedded review widgets pulling images from external domains, adding connection-setup overhead the CDN has no influence over.
- Generating image transformations client-side or via their own API some modules call an external image service directly, bypassing your CDN and origin configuration entirely.
The practical implication: inspect the actual rendered HTML and the actual network requests on a live page, rather than assuming PrestaShop’s documented default behavior explains everything you see. A slow image request that looks like a “PrestaShop” problem is very often coming from a third-party module template override, and fixing image types in the back office won’t touch it.
Version- or theme-specific behavior here varies enough that it’s worth flagging directly: exactly which hooks a given module uses to inject images, and whether a specific theme’s default templates include srcset are things to confirm in the actual codebase you’re working with VERIFY rather than assume, especially across PrestaShop 1.7.x, 8.x, and 9.x, where default theme (Classic theme evolution) and module APIs have changed.
12.0 Image Optimization and CLS
Cumulative layout shift on PrestaShop storefronts is very often image-driven. Common causes:
- Missing width/height attributes (or equivalent CSS aspect-ratio sizing), so the browser can’t reserve space before the image loads
- Incorrect aspect ratios between the declared dimensions and the actual delivered image, causing a shift once the real image loads
- Responsive image swaps (different srcset candidates at different breakpoints) that don’t share a consistent aspect ratio
- Lazy-loaded images without reserved space, causing content below them to jump into place as they load
- Product galleries and thumbnail strips where the active image size isn’t fixed ahead of load
- Sliders/carousels that render at zero height until their JS initializes
- Promotional banners inserted via CMS blocks without explicit dimensions
The standard fix is ensuring the browser can reserve layout space before the image finishes loading either through explicit width/height attributes on the image <img> (which establishes the correct aspect ratio for the browser automatically in modern browsers) or via CSS:
.product-image {
    aspect-ratio: 1 / 1;
}
The ratio used should match the actual image presentation for that specific block — a 1:1 ratio is common for PrestaShop product images because many stores standardise on square product photography, but this is a design decision specific to your catalogue and theme, not a universal default. Don’t apply an arbitrary fixed height as a shortcut; on a responsive theme that will distort images or crop them unpredictably across breakpoints.
13.0 Image Optimization and INP
Interactions to Next Paint are predominantly a JavaScript performance metric but image interaction patterns on PrestaShop product pages might impact this metric too:
Scripts responsible for re-rendering the DOM when a thumbnail is clicked
Zooming mechanisms (such as magnifier overlays and even more so those requiring a separate high-resolution image on hover/click)
Product combination images (selection of different colors/variations results in swapping out of the main product image)
Heavy initialization or transition logic associated with sliders/carousels
Complex lazy-loading libraries with heavy scroll or intersection handling
Ajax image replacement patterns
It’s worth highlighting here the important difference: the larger an image file size is, the larger the loading problem it represents (it affects paint and LCP). The JavaScript handling the interactions of the loaded image afterwards (switching, zooming, and combinations) is a totally different problem, which impacts INP. Solving one won’t solve the other, and analyzing INP problems in terms of image file sizes is misleading since the real cause is in the costly gallery/zoom script execution.
14.0 Mobile Image Performance
Mobile-specific image performance deserves separate attention because PrestaShop’s default and many third-party themes historically served the same image markup to all devices, relying on CSS to scale down rather than serving genuinely smaller files.
Key levers specific to mobile delivery:
- Responsive image sizes via srcset/sizes, letting the browser choose an appropriately sized derivative based on viewport and pixel density, rather than always requesting the largest available version.
- WebP generally reduces file size further, which matters proportionally more on constrained mobile connections.
- Lazy loading below the fold mobile viewports show less content per screen than desktop, so more of a typical category or homepage layout sits “below the fold.” Correct lazy loading has a larger relative impact on mobile.
- LCP image priority, the same rules apply as discussed earlier, but the LCP element is frequently different on mobile vs. desktop layouts (a stacked mobile layout may put a different image first), so confirm the mobile LCP element separately rather than assuming it matches desktop.
- Mobile network conditions: mobile connections vary far more widely in latency and bandwidth than typical desktop broadband; test with Chrome DevTools’ network throttling (or real device testing) rather than only on a fast office connection.
- CDN edge location matters more when the customer base includes markets further from your CDN’s nearest edge; if your customer base is regionally concentrated, confirm the CDN actually has an edge presence relevant to them.
- Dimensions and compression the same principles as desktop, but the gap between “displayed size” and “delivered size” is typically larger on mobile because so many themes were designed desktop-first.
Delivering a desktop-sized image to a mobile viewport is one of the most common and most avoidable, performance problems on PrestaShop storefronts and it’s also one of the easiest to verify: Open DevTools, switch to a mobile device emulation profile, reload, and check the Network panel for the actual transferred size of the main product image against its rendered dimensions.
15.0 Real-World PrestaShop Image and CDN Problems
The following are illustrative diagnostic scenarios, not reported case studies or benchmark claims treat them as patterns to check for, not guaranteed findings.
15.1 Example 1 — CDN Enabled but Images Still Slow
Symptom: a CDN is configured, and the theme correctly points at the CDN hostname for static assets, but PageSpeed/Lighthouse still flags slow image loading, and DevTools shows most image requests taking origin-like response times.
Likely cause: the CDN’s cache rules don’t actually cover the path pattern. PrestaShop generates images under (for example, a rule scoped to /themes/* while product images are served from /img/p/*), so every request is technically routed through the CDN but results in a cache miss and a full origin round-trip every time.
Diagnosis: check the CDN’s cache-status header (HIT/MISS) across several repeated requests to the same image URL. Consistent MISS on a URL that hasn’t changed points directly at a cache-rule scoping problem, not an image-size problem.
15.2 Example 2 — Old Product Image After Replacement
Symptom: a product image is replaced in the back office; the storefront continues showing the old image, sometimes only for some visitors.
Likely cause: the image URL is unchanged (same filename), so the CDN has no signal that the content changed and continues serving the previously cached copy until TTL expiry or an explicit purge.
Fix direction: either purge the specific resource after replacement, or (more robust long-term) introduce cache-busting via a version-aware filename or query parameter that’s included in the cache key with the query-string caveat discussed earlier kept firmly in mind.
15.3 Example 3 — Mobile LCP Image Served Too Large
Symptom: mobile PageSpeed score flags “Properly size images” specifically for the main product image, despite a CDN being in place.
Likely cause: the CDN is correctly caching and serving the image quickly, but it’s the same large derivative being served to every device, because the theme’s markup doesn’t implement srcset, and the CDN has not been configured (or doesn’t support) automatic responsive transformation.
Fix direction: implement responsive delivery either theme-level srcset/sizes pointing at genuinely different-sized derivatives or a CDN image-transformation feature configured to serve appropriately sized variants, depending on what your provider supports (VERIFY against your specific CDN’s capabilities).
15.4 Example 4 — Query Parameters Destroy Cache Efficiency
Symptom: DevTools shows a huge number of distinct image URLs for what should be a much smaller set of actual images, and CDN cache-status headers show near-constant MISS.
Likely cause: a module, theme cache-busting mechanism, or session-related parameter is appending unique or frequently changing query strings to image URLs, and the CDN’s cache key includes the full query string, so each unique URL is treated as a distinct object that’s essentially never requested twice.
Fix direction: identify the source of the changing parameter, evaluate whether it can be removed or normalized at the URL level, and only after confirming the parameter has no effect on actual image content consider excluding it from the CDN cache key.
16.0 Practical Diagnostic Workflow
A repeatable sequence for auditing image and CDN performance on a PrestaShop store:
Step 1 Identify the slow page. Test representative page types separately: homepage, product page, category page, search results page, and any dedicated landing pages image behaviour differs meaningfully between them.
Step 2 Identify image requests. In Chrome DevTools Network panel, filter by Img and capture: URL, resource size, transferred size (note the difference this reveals compression/caching effects), content type, HTTP status, timing breakdown, initiator (what triggered the request), and resource priority.
Step 3 Identify the LCP element. Use PageSpeed Insights or Lighthouse’s LCP element callout don’t assume which image it is.
Step 4 Inspect CDN behavior. Check response headers on image requests for cache status, Age, Cache-Control, ETag/Last-Modified, confirming requests are actually hitting the CDN hostname you expect.
Step 5 Compare origin and CDN. Request the same resource directly from origin (bypassing the CDN hostname) and compare timing — this tells you how much the CDN is actually contributing versus how much is baked into the image/origin itself.
Step 6 Optimise the image. Adjust dimensions to match actual rendered size, choose an appropriate format, apply reasonable compression, and implement responsive delivery where the mismatch between displayed and delivered size justifies it.
Step 7 Fix CDN configuration. Review cache rules and path coverage, TTL values, cache-key composition (including query-string handling), HTTPS/certificate setup, origin configuration, and purge/invalidation process.
Step 8 Re-test. Compare before/after using the same methodology (same tools, same throttling profile, same page) don’t compare a throttled mobile test against an unthrottled desktop one.
Step 9 Verify storefront functionality. Before considering the work done, check: product images render correctly across all combinations, image zoom still functions, mobile gallery/swipe behaviour is intact, add-to-cart flow is unaffected, product and category pages render correctly, checkout completes normally, and analytics/tracking pixels still fire. Performance changes to image and cache configuration have real potential to break functionality if applied carelessly, particularly cache-key changes and .htaccess/server-level rewrites.
17.0 Common Image and CDN Optimisation Mistakes
- Assuming a CDN automatically makes every image faster, without verifying cache hit rates
- Serving oversized images through a CDN — fast delivery of the wrong-sized file is still wasted transfer
- Lazy-loading the LCP image
- Preloading every image on the page instead of the single confirmed LCP candidate
- Converting images to WebP by renaming the extension rather than re-encoding
- Using WebP without a fallback where the implementation actually requires one
- Purging the entire CDN cache as the default response to a single stale-image report
- Ignoring cache headers when diagnosing “slow despite CDN” issues
- Ignoring cache-key composition, especially query-string handling
- Ignoring query strings generally as a source of cache fragmentation
- Using incorrect or inconsistent CDN origin configuration
- Serving mixed HTTP/HTTPS resources, triggering browser warnings or blocked requests
- Optimising the original uploaded image while a theme or module still delivers an oversized generated derivative
- Ignoring mobile-specific image delivery in favour of desktop-only testing
- Installing multiple image-optimisation modules without understanding how (or whether) they interact — or conflict
- Optimising image files while ignoring server response time (TTFB) at the origin
- Assuming CDN configuration, terminology, and behaviour is identical across providers
18.0 Measuring the Results
Before making changes, capture a baseline. After making changes, measure the same things the same way. Useful indicators:
- LCP (field data via CrUX/PageSpeed Insights where available, plus lab data via Lighthouse)
- Image request duration (DevTools Network timing)
- Image transfer size (transferred size, not just resource size — this reflects actual compression and caching benefit)
- Resource timing (via the Resource Timing API or DevTools Performance panel)
- TTFB for both origin and CDN-served requests
- CDN cache HIT/MISS ratio, where your provider exposes this
- Number of image requests per page
- Total page weight
- Mobile-specific performance, measured separately from desktop
Do not present any of the above as a fixed, predictable improvement — actual results depend on user geography, device type, network conditions, which CDN edge location serves a given request, cache warm/cold state at time of test, the specific images involved, origin server performance, the page template in use, and any third-party scripts running on the page. A change that improves LCP by a meaningful margin on a warm cache from a nearby edge may show a smaller improvement — or none — for a first-time visitor from a region with a more distant edge location and a cold cache.
19.0 Final Recommendations
- Treat image optimisation and CDN configuration as one connected problem, not two independent checkboxes.
- Diagnose using the actual delivery chain — PrestaShop → server → image generation → CDN → cache → browser — rather than assuming any single stage is responsible.
- Confirm the LCP element before optimising anything aimed at “improving LCP.”
- Verify responsive image delivery genuinely serves smaller files to smaller viewports; don’t assume a theme handles this by default.
- Treat WebP/AVIF claims literally — confirm the bytes are actually re-encoded, not just relabelled.
- Review CDN cache rules, TTL, and cache-key composition directly against response headers, not against assumptions about how “CDNs generally work.”
- Handle cache invalidation surgically — purge specific resources, not the entire cache, as a default habit.
- Test all changes in staging first, and verify storefront functionality (not just performance scores) after any change to caching, CDN configuration, or image-generation settings.
- Re-measure after changes using consistent methodology, and be honest about the fact that results will vary by device, geography, and cache state.
If you have questions or need assistance with your website performance or migration, our experts are here to help. Contact the Knowband team at [email protected] today for reliable ecommerce plugins tailored to your eCommerce needs.

